When colder weather rolls in, your air conditioner needs attention too. Knowing how to winterize an air conditioner can help prevent cold-weather damage, reduce wear and tear, and make spring startup smoother.
This guide walks through air conditioner winterization for both window and outdoor units, with clear, renter-friendly steps and safety-first tips. Whether you’re handling it yourself or planning to book help, here’s what to know before winter hits.
Why You Should Winterize Your Air Conditioner
Skipping AC winterization can lead to avoidable problems once temperatures drop.
Cold weather can cause:
- Moisture buildup that leads to corrosion or mold
- Debris damage from leaves, dirt, or snow
- Frozen components that crack or weaken internal parts
Taking time to winterize your air conditioner helps protect the unit during months when it’s not in use and keeps it ready for warmer weather.
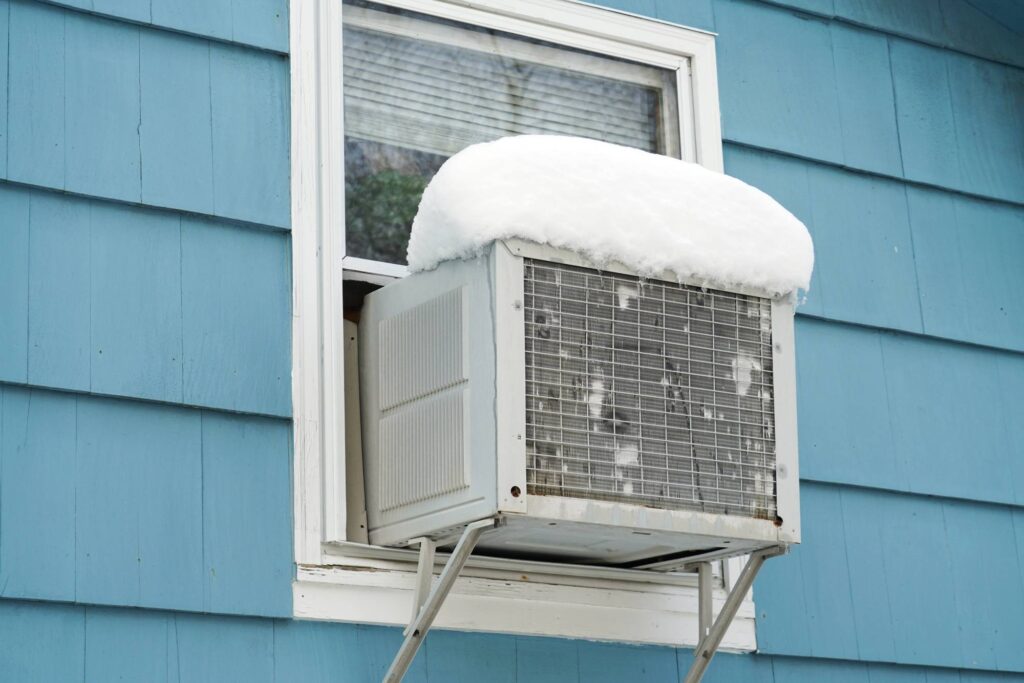
How to Winterize a Window Air Conditioner
Window units come with a few extra considerations during colder months, particularly when it comes to placement, exposure, and insulation. The steps below focus on practical ways to prep your unit for the winter season.
1. Decide If You’ll Remove the Unit or Keep it Installed
Before winterizing your window air conditioner, decide whether it makes sense to remove the unit or leave it in place. The best option depends on your climate, access, and comfort level.
- Removing the unit is often ideal in cold or snowy areas, as it protects internal parts and helps eliminate draft
- Leaving it installed can be more practical in apartments or upper-floor windows, especially for heavy units
If the unit stays in, proper sealing and a breathable cover are key to keeping out cold air and moisture.
2. Clean and Drain the Unit
Cleaning away buildup and draining excess water reduces the risk of odors, mold, or damage during the winter months, keeping your window unit fresh and protected while it’s not in use.
To clean and drain the window AC:
- Turn the unit off and unplug it
- Remove and wash the filter, then let it dry completely
- Wipe down the exterior and vents
- Make sure all water has drained to prevent freezing
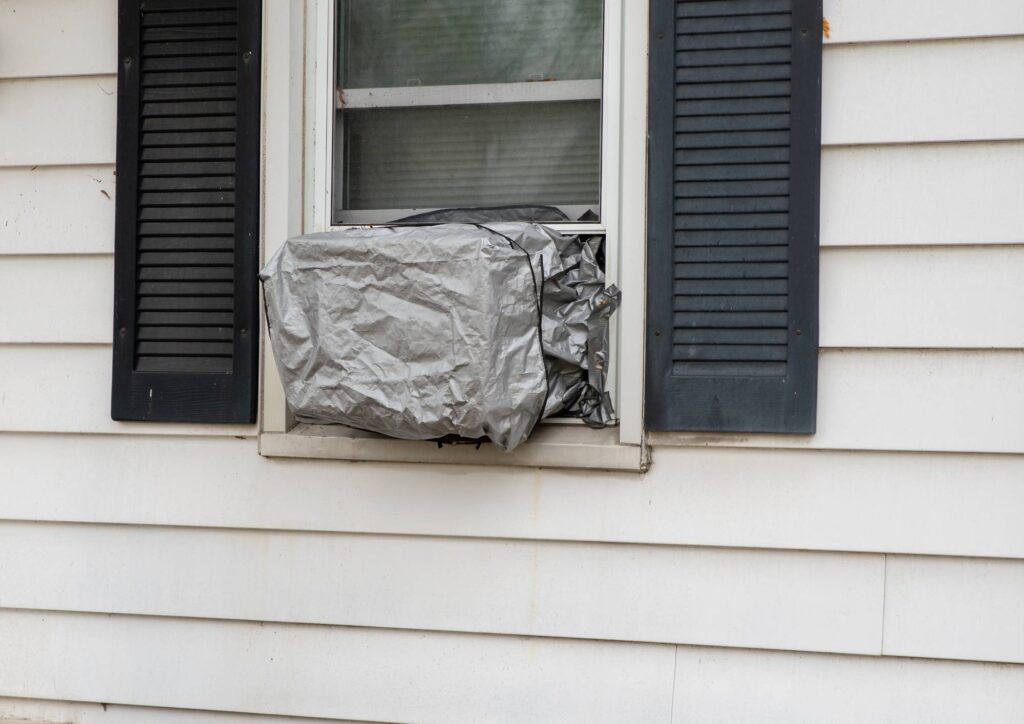
3. Store or Seal the Unit Properly
If removed:
- Store the unit indoors in a dry place
- Keep it upright to protect internal components
- Keep hardware together by placing brackets, screws, and side panels in a labeled bag
- Consider a moisture absorber nearby to help prevent musty odors while the unit is stored
If left installed:
- Use foam insulation panels around the unit
- Seal gaps with weatherstripping
- Add a breathable AC cover designed for window units
- Inspect seals throughout the winter to make sure insulation hasn’t shifted
Avoid plastic tarps, which can trap moisture and cause damage.
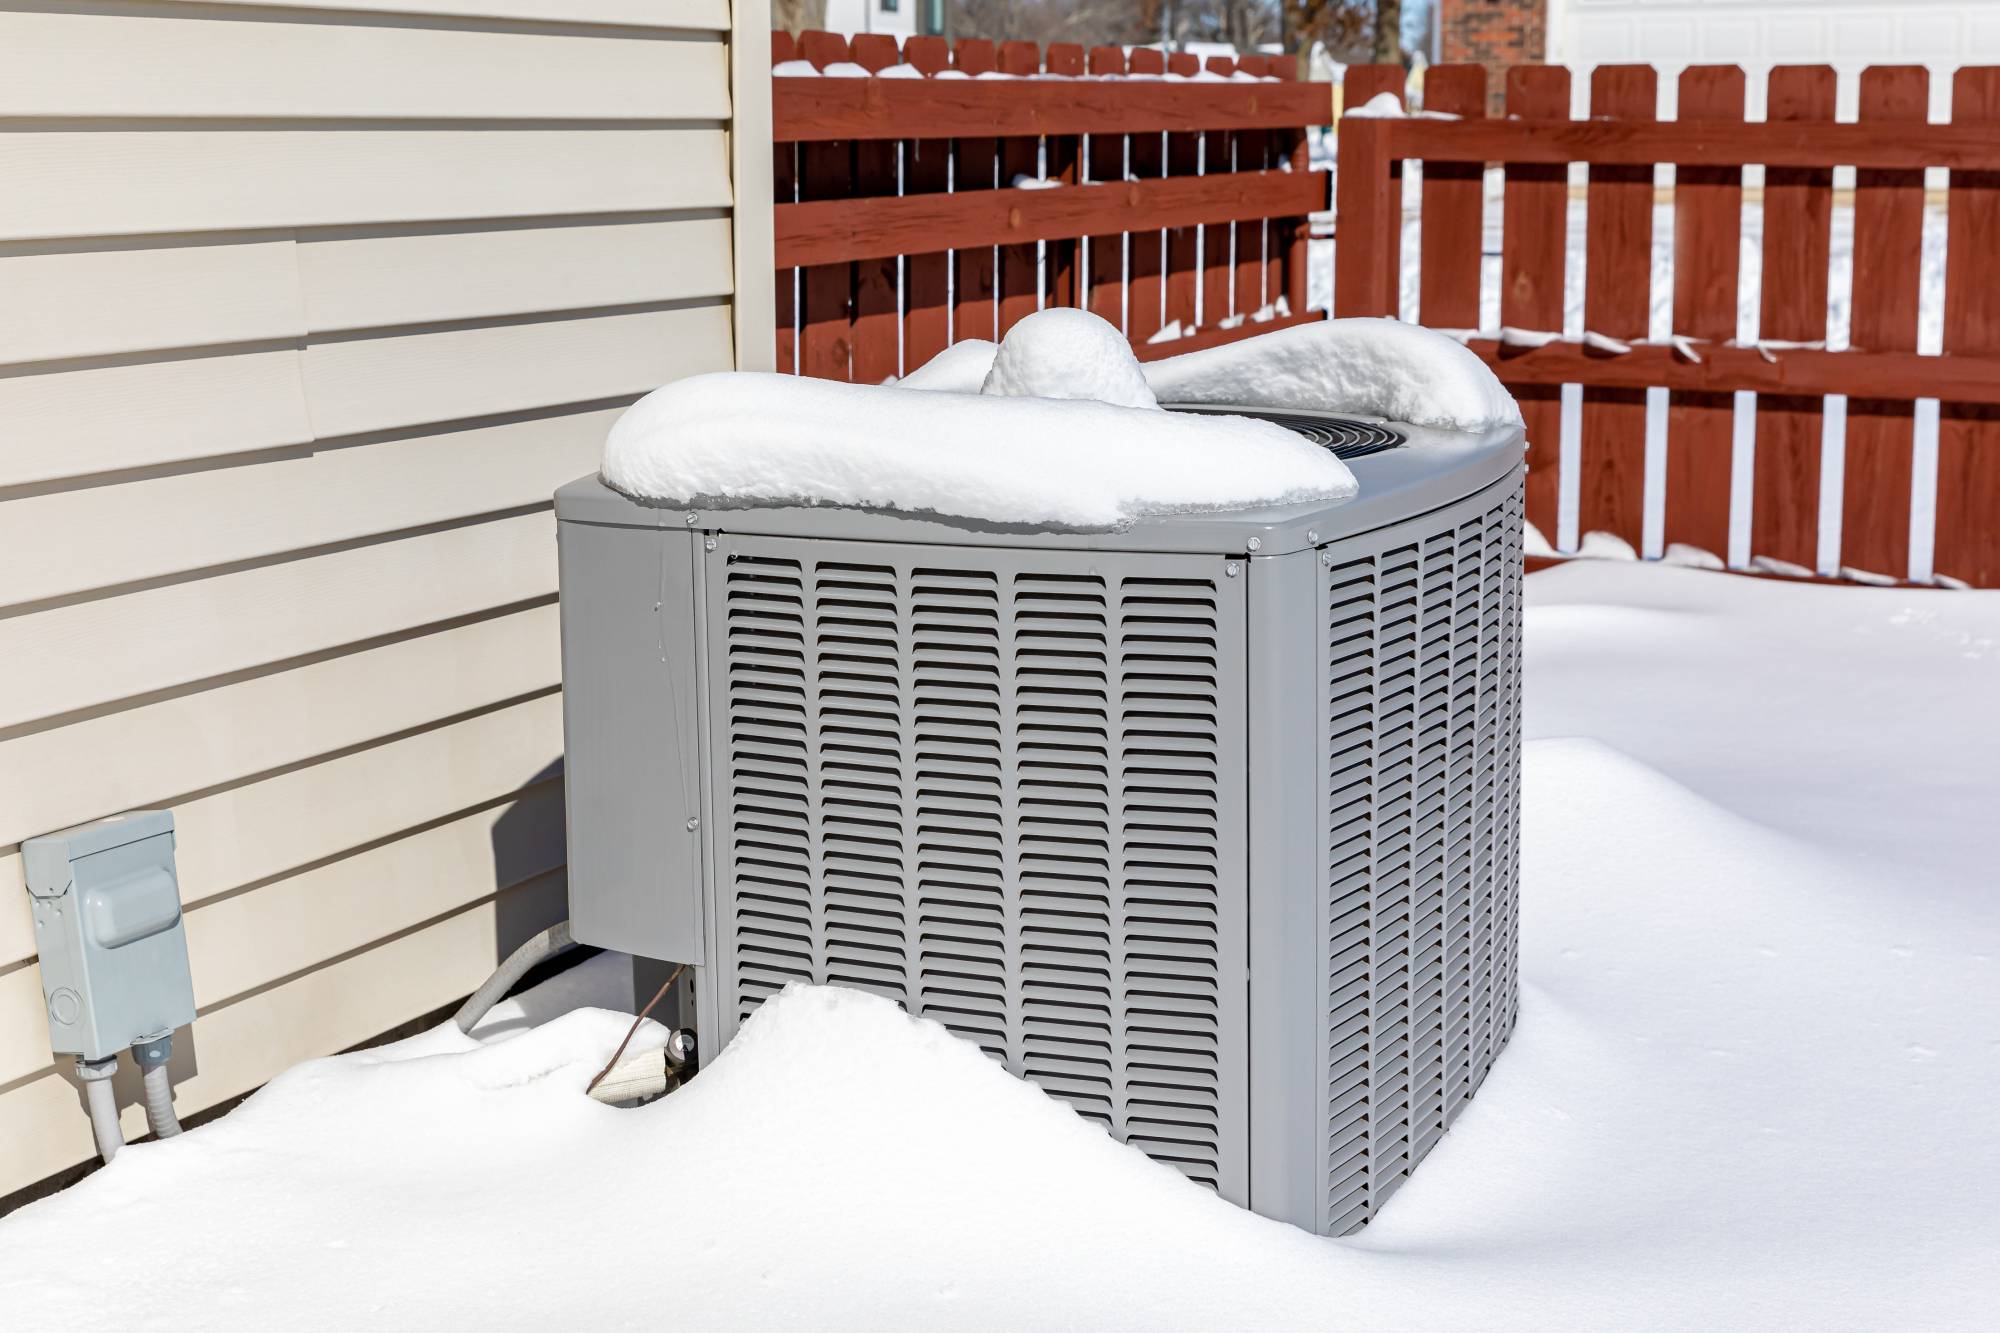
How to Winterize an Outdoor Air Conditioner Unit
Outdoor AC units also benefit from seasonal prep, even though they’re built to withstand the elements.
1. Shut Off Power Safely
Locate the exterior disconnect box near the unit and switch the power off. This prevents the system from running during unexpected warm spells.
2. Clear Debris
Clearing debris helps prevent moisture buildup and keeps the unit from becoming a winter home for pests. Taking a few minutes to tidy up the area can go a long way toward protecting your outdoor air conditioner during the off-season:
- Remove leaves, dirt, and grass clippings
- Trim back plants or shrubs at least two feet around the unit
- Gently rinse the exterior if needed, then let it dry fully
3. Cover With Care
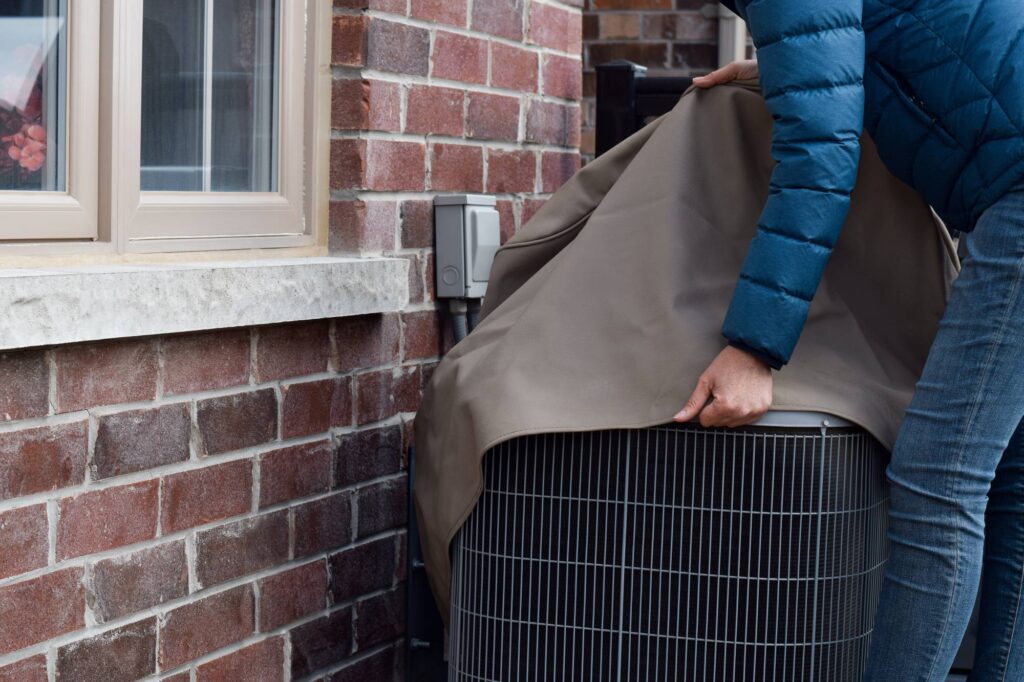
Use a breathable, manufacturer-approved AC cover or a fitted top cover that protects from falling debris while allowing airflow.
Do not wrap the unit tightly or cover the sides completely, as this can trap moisture and invite rust or pests.
Common AC Winterization Mistakes to Avoid
Even well-meaning prep can backfire. Watch out for these common mistakes:
- Over-wrapping outdoor units, which traps condensation
- Skipping cleaning, leaving debris to break down over winter
- Using non-breathable covers, like plastic sheets or tarps
- Forgetting to seal window gaps, leading to drafts and higher heating costs
- Storing on a concrete floor, as they tend to hold and release moisture
Proper air conditioner winterization is about protection, not sealing everything airtight.
DIY vs. Hiring Help for Air Conditioner Winterization
Some homeowners and renters are comfortable handling basic AC winterization, while others prefer extra support.
DIY makes sense if:
- The unit is easy to access
- You’re removing a lightweight window AC
- Cleaning and sealing are straightforward
Booking help is a good idea if:
- The unit is heavy or awkward to remove
- You’re dealing with multiple units
- Accessing the outdoor unit feels unsafe
- You want help with other seasonal prep at the same time
Get Help With AC Winterization and Other Winter Tasks
If you’d rather skip the ladder or lifting, a Tasker can help with AC winterization and other seasonal projects. From removing and storing window units to prepping outdoor systems, help is available when you need it.
You can also explore support for a wide range of winter tasks, making it easier to get your home cold-weather ready all at once.
Book a Tasker and check winter prep off your list with confidence.
Last updated on December 16, 2025 by Grace Branscome