
Hanging curtains can make a big difference in how a room looks and feels. They add privacy, help control natural light, and bring a finishing touch to your windows. But getting them to hang just right takes more than putting a rod on the wall.
From choosing the right curtain length to measuring, mounting brackets, and securing the rod, a little planning goes a long way. This guide walks you through how to hang curtains step by step, with tips for different wall types and common installation challenges.
What You’ll Need to Hang Curtains
Before you start drilling, gather your tools and materials. Having everything within reach makes it easier to measure accurately and install your curtains without unnecessary interruptions.
Tools
You’ll need a few basic tools to measure your window, mark the bracket positions, and secure the curtain rod:
- Tape measure
- Pencil
- Level
- Drill/driver with appropriate drill bits
- Screwdriver
- Stud finder
- Step stool or ladder, if needed
Materials
The exact hardware you’ll need depends on your curtain style, rod, and wall type. Gather the following before starting:
- Curtain panels
- Curtain rod
- Mounting brackets
- Screws and mounting hardware
- Wall anchors or other fasteners appropriate for your wall type, if needed
- Curtain rings or clips, depending on your curtain style
Tip: Don’t assume the screws or anchors included with your curtain rod will work for every wall. Check your wall material before choosing fasteners, and follow the manufacturer’s instructions.
How to Hang Curtains in 10 Steps
Whether you’re installing curtains in your bedroom, living room, or another space, the basic process is similar. The key is to plan your curtain placement before drilling and make sure your mounting hardware can support the weight of the rod and panels.
1. Check Your Curtains and Curtain Rod
Start by looking at your curtains and rod together. Their size, weight, and design will affect how you install them.
Check the following:
- Curtain length: Confirm the length of your panels and where you want them to fall.
- Curtain heading: Identify how your curtains attach to the rod, whether through grommets, tabs, a rod pocket, rings, or clips.
- Rod length: Make sure your curtain rod can extend far enough beyond the window.
- Weight capacity: Check the manufacturer’s recommendations for the combined weight of your curtains and rod.
- Bracket requirements: Determine whether your setup needs two outer brackets or an additional center support.
Longer rods and heavier curtains may require extra support to prevent sagging. Checking these details now can help you avoid having to reposition brackets later.
2. Decide Where Your Curtains Should End
Before determining where to mount the curtain rod, think about where you want the bottom of your curtains to fall.
Common curtain lengths include:
- Sill-length curtains: End at or near the windowsill, making them useful for certain smaller windows or spaces where floor-length panels aren’t practical.
- Below-sill curtains: Extend slightly past the windowsill for additional coverage.
- Floor-length curtains: Hang close to the floor for a clean, finished appearance.
- Puddled curtains: Extend beyond the floor so extra fabric gathers at the bottom for a softer, more dramatic look.
For floor-length curtains, hold a panel against the wall before drilling to see where the hem will land. Remember that the way your curtains attach to the rod can affect their final hanging length.
If your curtains are already purchased, their length may limit how high you can position the rod.
3. Determine How High to Hang the Curtain Rod
Curtain rod height affects both the appearance of your windows and where the panels fall.
When deciding how high to hang curtains, a common starting point is 4–6 inches above the window trim. However, this isn’t a strict rule. Positioning the rod higher can create the appearance of taller windows and ceilings, provided your curtains are long enough.
Before marking the wall, consider:
- The height of your window and ceiling
- The length of your curtain panels
- How the curtains attach to the rod
- Where you want the bottom of the curtains to fall
Hold the curtain panel in place or measure carefully to confirm your preferred height works with your chosen length.
4. Measure How Wide to Hang the Curtain Rod
Curtain rod width is just as important as height. If the rod is too narrow, your curtains may cover too much of the window when they’re open.
As a starting point, plan for your curtain rod to extend approximately 4–6 inches beyond each side of the window.
This gives the panels room to gather beside the window instead of blocking the glass.
A wider installation can also make the window appear larger and allow more natural light into the room when the curtains are open.
Before finalizing the width:
- Measure the width of your window.
- Add the desired extension on both sides.
- Confirm your curtain rod accommodates the total span.
- Check whether the longer span requires additional brackets.
Tip: Consider how much space your curtains take up when fully open. Thicker fabrics or wider panels may need additional room beside the window.
5. Mark Where the Curtain Rod Brackets Will Go

Once you’ve determined the height and width, it’s time to mark the mounting locations.
Start with one outer bracket and use a pencil to mark its position. Measure across the window to locate the opposite bracket, making sure both are positioned at the same height.
Use a level to check your measurements rather than relying on the window frame or ceiling as a visual reference.
At this stage, you’re establishing the bracket positions, not drilling the holes.
If your curtain rod requires a center support, wait until the outer brackets are installed and you’ve checked the empty rod for level before positioning the additional bracket.
6. Check Your Wall Type and Choose the Right Hardware
Before drilling, determine what material you’ll be mounting into. Different wall types require different fasteners, and choosing the wrong hardware can leave your curtain rod unstable.
Here’s what to consider:
| Wall Type | Installation Considerations |
|---|---|
| Drywall with a stud | If a bracket aligns with suitable framing, you may be able to fasten directly into it using appropriate screws. |
| Hollow drywall | Use anchors designed for drywall and rated to support the combined weight of the rod and curtains. |
| Plaster | Plaster can be brittle. Drill carefully and choose fasteners suitable for the plaster and underlying material. |
| Brick or concrete | Masonry drill bits and appropriate masonry fasteners may be needed. |
| Tile | A tile or ceramic bit may be needed to drill through the surface before reaching the material behind it. |
Knowing how to find studs in walls can help you identify suitable mounting locations when attaching brackets to framing. Always check the curtain rod and fastener instructions before proceeding.
Safety tip: Before drilling, check for possible electrical wiring, plumbing, or other concealed utilities. If you’re unsure what’s behind the wall, don’t drill until you’ve confirmed it’s safe.
7. Drill the Mounting Holes and Install the Brackets
With your mounting positions established and the appropriate hardware selected, you’re ready to install the outer brackets.
- Hold the first bracket against its marked position.
- Use the bracket’s mounting holes as a guide to mark the screw locations.
- Drill pilot holes using the bit and hole size specified for your hardware.
- Install wall anchors if your wall type and mounting setup require them.
- Secure the bracket with the appropriate screws.
- Repeat the process for the second outer bracket.
Follow the manufacturer’s instructions for drilling depth, anchor installation, and screw placement.
Avoid overtightening screws, especially when working with brittle surfaces or certain types of anchors.
8. Install the Curtain Rod and Check That It’s Level
Once the two outer brackets are secure, place the empty curtain rod into them.
Use a level to confirm the rod sits evenly across the window. If something needs adjusting, it’s easier to address it before adding the weight of the curtains.
If your installation requires a center support:
- Position the center bracket using the level rod and the manufacturer’s instructions.
- Mark the bracket location.
- Remove the rod.
- Install the center support using the appropriate mounting hardware.
- Replace the empty rod and check that everything is level again.
The goal is to have a stable, properly supported rod before hanging the curtain panels.
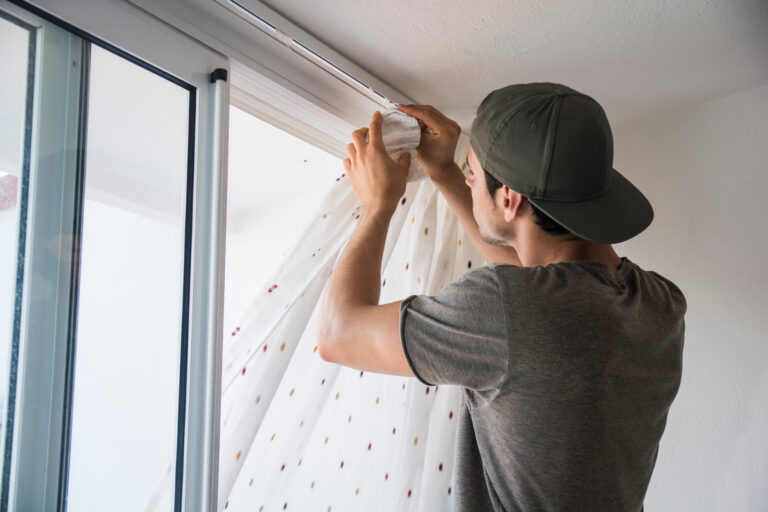
9. Hang the Curtains on the Rod

Now for the part that brings everything together: adding your curtains.
The process depends on the type of curtain heading you have.
- Grommet curtains: Slide the rod through the metal-reinforced openings along the top of the panels.
- Rod-pocket curtains: Feed the rod through the fabric pocket.
- Tab-top or back-tab curtains: Thread the rod through the fabric tabs or loops.
- Curtains with rings or clips: Attach the panels to the appropriate rings or clips according to the hardware instructions.
- Pleated curtains: Use the compatible hooks, rings, or other hanging hardware specified for your curtain style.
If necessary, remove a finial or rod end before adding the panels.
Once the curtains are attached, carefully place the rod back into the mounted brackets. Secure any set screws, finials, or other hardware according to the manufacturer’s instructions.
Make sure the panels are arranged correctly before moving on.
10. Test and Adjust Your Curtains
Before calling the project finished, open and close your curtains a few times.
Check that:
- The curtain rod remains level
- The brackets stay firmly in place
- The curtains move as intended
- The panels clear the window when opened
- The curtain hems fall at your desired length
- All finials, set screws, and other hardware are secure
If something looks uneven or doesn’t move smoothly, inspect the rod, brackets, and curtain attachments before making adjustments.
A final check helps you catch small installation issues before they become bigger frustrations.
Common Curtain-Hanging Mistakes to Avoid
Even a straightforward curtain installation can run into problems. Here are a few mistakes worth watching for:
- Measuring before checking the curtain length: Mounting your rod without considering the actual curtain panels can leave you with curtains that are too short or longer than intended. Decide where the hem should fall before determining the rod height.
- Installing the rod too close to the window edges: When brackets are too close to the window, open curtains may still cover much of the glass. Start with a rod extension of approximately 4–6 inches on each side, then adjust based on your space and curtain width.
- Using the wrong wall anchors: Hardware intended for hollow drywall may not be appropriate for plaster or masonry. Identify your wall material and choose fasteners rated for the weight and mounting conditions.
- Forgetting about center supports: Long rods or heavy curtain panels may need additional support. Check the manufacturer’s recommendations for span, weight capacity, and bracket requirements.
- Skipping the final level check: Even carefully measured brackets can leave a rod slightly uneven. Check the empty rod before adding curtains, then test the finished installation.
Tips for Hanging Curtains in Different Situations
Some curtain installations require extra planning or specialized hardware. Keep these considerations in mind:
- Heavy curtains: Blackout curtains, lined drapes, and other heavier panels may put additional strain on the rod and brackets. Choose a rod with an appropriate weight capacity and follow the manufacturer’s guidance on support requirements.
- Plaster or masonry walls: These surfaces may require different drill bits, fasteners, and installation techniques than drywall. Check the wall construction before choosing hardware, and consider booking help if you’re unfamiliar with drilling into these materials.
- High windows: Measuring and mounting can be more challenging when windows are difficult to reach. Use appropriate equipment, avoid overreaching, and consider getting help with particularly high installations.
- Ceiling-mounted curtains: Ceiling mounting can create a floor-to-ceiling look or work where wall mounting isn’t practical. Use hardware designed for overhead installation and fasteners appropriate for the ceiling structure and curtain weight.
Get Help Hanging Curtains With Taskrabbit
Hanging curtains can be a manageable DIY project, but not every installation is straightforward. Heavy drapes, high windows, unfamiliar wall materials, and long curtain rods can make the process more involved.
If you’d rather leave the measuring and mounting to someone else, Taskrabbit connects you with Taskers who can help with curtain and blind installation.
Last updated on October 27, 2026 by Grace Branscome