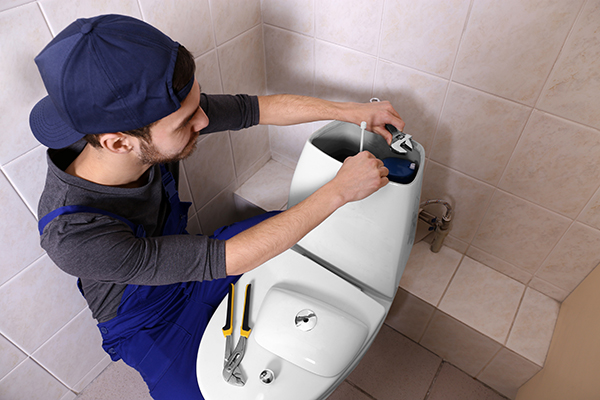
A toilet that won’t stop running can be more than an annoying background noise. It can also waste water and increase your utility bill. Fortunately, many running-toilet problems come down to a few components inside the tank.
Before replacing parts, take a look inside. Whether your toilet runs constantly, keeps refilling, or starts running again after a flush, watching where the water goes can help you figure out what’s wrong.
This guide walks you through the most common causes of a running toilet, how to troubleshoot them, and when it’s time to get help.
Want to see what these problems look like inside the tank? Watch the video above for a visual walkthrough from a Tasker, then use the guide below to troubleshoot your toilet and find the instructions you need.
Why is My Toilet Running?
A running toilet usually means water is moving through the tank when it shouldn’t be, or the tank isn’t shutting off its water supply properly.
Some of the most common causes include:
A worn or damaged flapper or flush-valve seal: If the seal is cracked, warped, or covered in debris, it may not close completely, allowing water to leak from the tank into the bowl.
An improperly adjusted flapper chain: A chain that’s too tight can hold the flapper open slightly, preventing a proper seal and allowing water to keep flowing into the bowl.
An incorrectly adjusted float or water level: If the float is set too high, water may continue filling the tank and flowing into the overflow tube.
An improperly positioned refill tube: If the tube extends too far down into the overflow tube, it can siphon water from the tank and cause the toilet to refill repeatedly.
A malfunctioning fill valve: If the valve doesn’t shut off when the tank reaches the correct water level, water may continue entering the tank and flowing into the overflow tube.
These issues can cause a toilet to run constantly, continue running after a flush, or refill unexpectedly. The best way to identify the cause is to remove the tank lid and watch what happens during a complete flush.
Understanding the Parts Inside Your Toilet Tank
You don’t need to know every component to troubleshoot a running toilet, but understanding a few key parts can make the process easier.
| Component | What It Does |
| Flapper or flush-valve seal | Opens during flushing and closes to keep water in the tank |
| Flush chain | Connects the flush handle to the flapper |
| Overflow tube | Directs excess tank water into the bowl |
| Fill valve | Refills the tank after flushing |
| Float | Helps control when the fill valve shuts off |
| Refill tube | Directs water into the overflow tube to refill the bowl |
What You’ll Need to Fix a Running Toilet

You can investigate many running-toilet problems without buying replacement parts.
For an initial inspection, gather:
A towel, rag, or sponge and a bucket for drips
A flashlight if the tank is difficult to see inside
A screwdriver if your toilet’s float adjustment requires one
Rubber gloves, if preferred
If you discover a damaged component, you may need a compatible replacement flapper, chain, or fill valve. More involved repairs may also require adjustable pliers and a bucket.
Before you begin: Locate the toilet’s water shutoff valve, usually behind or beside the toilet. Knowing where it is allows you to stop the water supply before removing components.
How to Fix a Running Toilet in 7 Steps
Rather than replacing parts at random, work through the following checks to identify what’s causing the problem.
1. Watch What Happens During a Flush
Carefully remove the tank lid and set it somewhere secure.
Flush the toilet and watch the entire cycle, from the moment the flapper opens until the tank finishes refilling.
Look for three things:
The seal: Does the flapper close completely after the flush?
The water level: Does the water stop below the top of the overflow tube?
The shutoff: Does the fill valve stop supplying water once the tank reaches its intended level?
If the flapper doesn’t seal, continue with Steps 2 and 3.
If water rises into the overflow tube, focus on Steps 4 through 6.
This quick inspection helps you concentrate on the components most likely to be responsible.

2. Check the Flapper or Flush-Valve Seal
The flapper prevents tank water from flowing into the bowl between flushes. When it becomes worn, warped, or covered in debris, it may no longer form a complete seal.
Inspect the flapper for cracks, deterioration, mineral buildup, or anything preventing it from sitting flat.
If the toilet is running, gently press the flapper down. If the running stops, you’ve identified a likely sealing problem.
Start by cleaning debris from the sealing surface. If the flapper is damaged or still won’t seal, replacement may be necessary.
How to Replace a Toilet Flapper
Turn off the toilet’s water supply.
Press and hold the flush handle to drain most of the tank.
Soak up remaining water with a towel or sponge.
Disconnect the chain from the flush handle.
Remove the old flapper according to your toilet’s design.
Wipe the sealing surface clean.
Install a compatible replacement.
Reconnect the chain and restore the water supply.
Check your toilet’s model or existing flapper before purchasing a replacement. Flappers and flush-valve seals aren’t universally interchangeable.
3. Adjust the Toilet Flapper Chain
A working flapper can still leak if the chain prevents it from closing.
Too tight: The chain can hold the flapper slightly open, allowing water to escape into the bowl.
Too loose: The flapper may not lift far enough during flushing, causing a weak flush. Excess chain can also snag on other components.
With the flapper closed, check that the chain has a little slack.
If necessary, move its connection point on the flush handle arm. Then flush the toilet to confirm that the flapper opens fully and closes without the chain getting caught.
You shouldn’t need to replace the chain unless it’s damaged or can’t be adjusted properly.
4. Check the Water Level and Float
If the flapper seals correctly but water continues flowing into the overflow tube, the tank may be filling too high.
The float helps control when the fill valve stops adding water. Its adjustment mechanism varies by toilet, but many models use a screw, rod, or dial.
To correct the water level:
Find the float and its adjustment mechanism.
Look for the tank’s marked fill line, if present.
Lower the float setting according to the fill valve manufacturer’s instructions.
Flush and allow the tank to refill.
Confirm that the water stops at the intended level, below the top of the overflow tube.
Make small adjustments and retest rather than changing the setting dramatically.
If adjusting the float doesn’t work: Check that it moves freely and isn’t catching on another component. If the water level is correct but the fill valve continues supplying water, move on to Step 6 to inspect the valve.
5. Check the Refill Tube
The refill tube is a small, flexible tube that sends water into the overflow tube to refill the toilet bowl after flushing.
If it’s positioned incorrectly, it may contribute to repeated refilling.
Check that the tube:
Is securely connected to the fill valve
Is held in place as specified by the toilet or fill valve manufacturer
Doesn’t extend too far down inside the overflow tube
Delivers water during the refill cycle
A tube inserted too deeply can create a siphoning effect, drawing water from the tank and causing the fill valve to turn on again.
If the tube has slipped out of position, secure it using the appropriate clip or connection for your toilet.
6. Inspect the Fill Valve
If the water level is adjusted correctly, the float moves freely, and water still keeps entering the tank, the fill valve may be malfunctioning.
Before replacing it, consult the manufacturer’s instructions. Some fill valves can be cleaned or serviced.
If replacement is necessary, the general process involves:
Turning off the water
supply and draining the tank
Disconnecting the water supply line and refill tube
Removing the mounting nut and old fill valve
Installing a compatible replacement at the correct height
Reconnecting the supply line and refill tube
Restoring the water supply and checking for leaks around the supply connection and base of the valve
Adjusting the water level and confirming the new valve shuts off when the tank reaches its intended level
Flushing again to verify that the toilet refills and stops running normally
Fill valve designs vary, so follow the instructions supplied with your replacement part.

Fill Valve vs. Flush Valve: These aren’t the same component. The fill valve controls water entering the tank. The flush valve allows water to leave the tank during a flush. Make sure you’re identifying the correct part before buying a replacement.
If you’re uncomfortable disconnecting the water supply or encounter damaged connections, consider getting help rather than forcing the repair.
7. Test Your Repair
Once you’ve made an adjustment or replaced a component, flush the toilet again before putting the tank lid back on.
Watch to make sure:
The flapper opens and closes properly.
The chain moves freely without catching.
The tank fills to the intended water level.
The fill valve shuts off.
Water stops running after the refill cycle.
If the toilet continues running, use the troubleshooting guide below to decide what to inspect next.
Running Toilet Troubleshooting Guide
Different symptoms can point to different problems. Use this table to narrow down the possibilities.
| What You Notice | Possible Cause | What to Check |
|---|---|---|
| Toilet runs constantly | Flapper isn’t sealing or fill valve won’t shut off | Flapper, chain, water level, and fill valve |
| Toilet keeps running after flushing | Flapper or chain isn’t returning correctly | Chain slack and flapper seal |
| Water flows into the overflow tube | Water level is too high or fill valve isn’t shutting off | Float adjustment and fill valve |
| Toilet randomly refills | Water is slowly escaping from the tank | Flapper seal and refill tube |
| Toilet has a weak flush | Flapper isn’t lifting fully or water level is too low | Chain movement and water level |
| Toilet still runs after adjustments | A component may be worn or malfunctioning | Recheck the affected components or get additional help |
These symptoms aren’t definitive diagnoses, but they can help you avoid unnecessary repairs.
How to Tell if Your Toilet Is Still Leaking
Not every running toilet makes an obvious sound. A slow leak from the tank into the bowl can be difficult to spot.
If you suspect the flapper isn’t sealing but can’t see water moving, try a food-coloring test.
Remove the tank lid.
Add a few drops of food coloring to the tank water.
Wait approximately 10–15 minutes without flushing.
Check whether the color appears in the toilet bowl.
If the color appears in the bowl, water is moving from the tank into the bowl when it shouldn’t be.
That suggests a leak through the flush-valve seal or another path between the tank and bowl. If the color stays in the tank, the test hasn’t detected that type of leak during the waiting period.
How to Prevent Your Toilet From Running Again
You can’t prevent every plumbing problem, but a few maintenance habits can help you spot issues before they become persistent.
Inspect the flapper periodically. Look for cracks, warping, or buildup that could prevent a proper seal.
Listen for unexpected refilling. A toilet that starts running when nobody has flushed it may be losing water from the tank.
Check the chain and float. Make sure the chain moves freely and the float isn’t catching on other components.
Clean buildup when needed. Follow the manufacturer’s recommendations for removing deposits around tank components.
Use compatible replacement parts. Match replacement flappers, seals, and valves to your toilet’s design rather than assuming every part fits.
Investigate changes early. A new running sound, weak flush, or unusual refill cycle is worth checking before the problem becomes more disruptive. The same goes for other bathroom fixtures, whether you need to fix a leaky bathtub faucet or address another persistent drip.
When to Get Help With a Running Toilet
Some running-toilet problems are straightforward to troubleshoot, but others require more involved repairs. If you’re also dealing with a clog, you may need to unclog your toilet before addressing any additional issues.
Stop and consider getting additional help if:
Water is leaking outside the toilet.
You notice cracks in the tank or bowl.
The shutoff valve won’t close.
The toilet still runs after the basic checks.
You aren’t comfortable disconnecting plumbing components.
The repair requires work beyond your experience.
Plumbing requirements vary by location, and certain repairs may require a licensed professional.
If you’d rather have someone troubleshoot the issue, Taskrabbit can connect you with a Tasker offering Plumbing Help. Discuss the scope of the repair and any necessary licenses or qualifications with your Tasker before booking.
Last updated on October 27, 2026 by Grace Branscome