We’ve all been there: you flip the switch in a restroom, and out of seemingly nowhere, the fan begins buzzing like a broken chainsaw. Shouldn’t someone do something about it? You wash your hands and put it behind you—for now. But then you get home and notice your bathroom’s exhaust fan sounds a bit off, too! What to do? Well, with a little help from Taskrabbit, you can get that old fan sounding (and working) like new in no time.
What Is A Bathroom Exhaust Fan?
A bathroom exhaust fan is a ventilation device that helps eliminate stale air and unwanted odors. It’s an essential part of keeping your bathroom feeling clean and fresh.

Replacing A Bathroom Fan
How long does it take to replace a bathroom fan?
It really depends on your skills and experience, but typically, replacing a bathroom fan is a long process. It requires electrical knowledge and some general DIY-know-how, so be sure not to underestimate the task.
Generally, it will take about two hours to remove the fan and another two or three to replace it. It can take longer depending on the fan’s age, location and complexity.
Cost of Replacing A Bathroom Fan
The cost of exhaust fan installation varies, but here’s quick, estimated breakdown:
- Labor: This varies greatly based on the service you choose. Taskrabbit electrical help starts at $40 per hour.
- Fan & Parts: $80 – $400
There are often unseen costs associated with installing a new exhaust fan, such as additional duct work or electrical work. If you think you’ll need additional work to help replace your fan, consider hiring a Tasker for help with minor repairs and modifications. If you have needs that go beyond “minor” changes, chat with a Tasker to explore your options.
Tools Needed To Replace An Exhaust Fan
Here are the tools you’ll need to replace your exhaust fan:
- Step ladder
- New exhaust fan
- Circuit tester
- Drill
- Measuring tape
- Screwdriver (multi-bit)
- Duct tape
- Jab saw
- Spackle
- Paint
These are the essential tools for the job, but you may also need:
- Caulk
- Expanding foam
- Stud finder
- Work lights
While this list is fairly exhaustive, you’ll never know what you might need when replacing an exhaust fan! Each situation is unique, so it’s important to be as prepared as possible before getting started.
Step By Step: How To Replace A Bathroom Fan
- Turn off the power. Turn off the power to your bathroom fan using the circuit breaker. Ensure there is no electricity flowing through the area you’re working in.
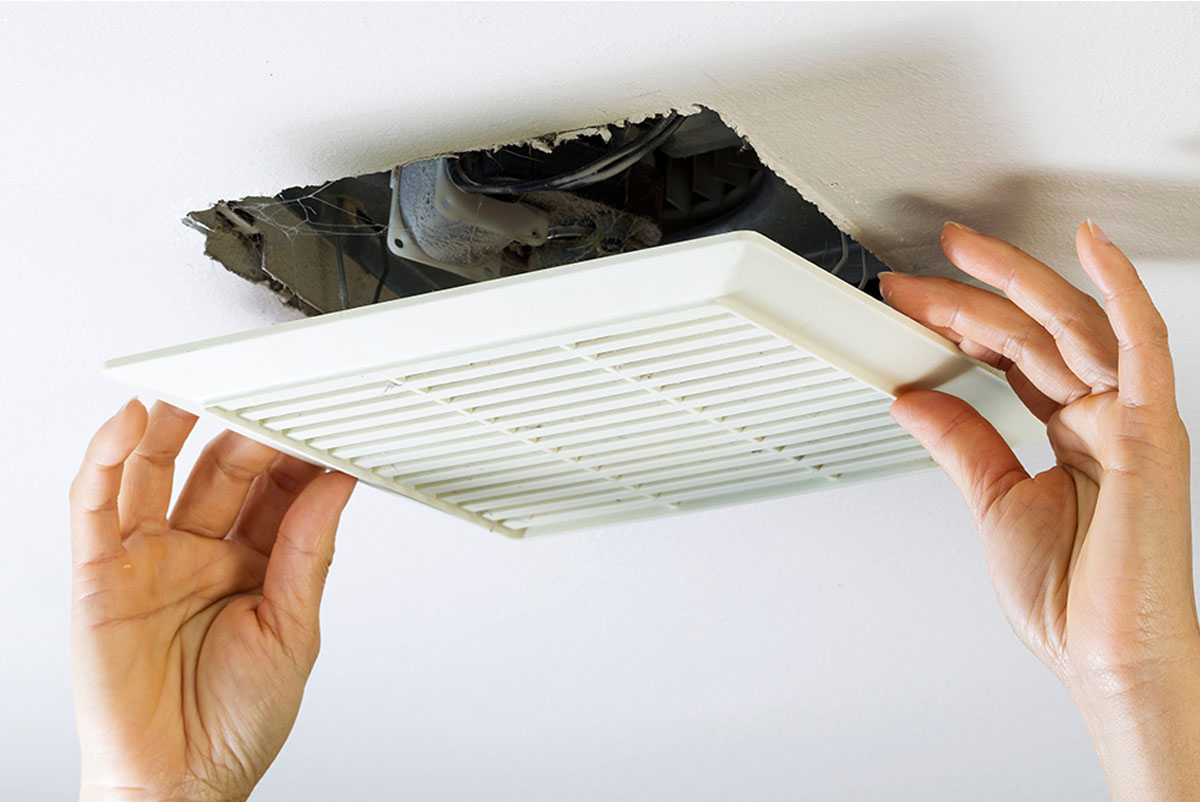
- Remove the broken/old fan. This seems like a no-brainer, but this is an essential early step. Remove the grille from your fan, and pull it off the face of the fan. Then disconnect the fan by unplugging it from its current receptacle. At this point, you should test to ensure the electricity is off with your circuit tester. If you’re not comfortable with this part, consider hiring a licensed Tasker to help.
- Ensure the hole is large enough for your new fan. Now that the old fan is removed, you’re probably looking right into a hole in the wall or ceiling. Measure your new fan against the hole to ensure it will fit. If it doesn’t fit, you may need to saw the hole to the correct size.
- Disconnect all remaining wires. Ensure all wires have been disconnected from the old fan. Remove any remaining housing from the old fan.
- Connect the new fan’s duct. Attach the duct in your wall/ceiling to the new fan. There should be an obvious duct adapter on your new fan, which is where the duct connects.
- Wire the new fan. First, remove the wiring cover from the new fan’s housing. Remove the knockout plug with a screwdriver. Next, connect the house wires to the fan wires (by matching the colors). Place the wires into the housing, and then replace the wire cover.
- Set the fan in the hole. Insert the fan into the hole you’ve made, ensuring that the outlet is aligned with the duct.
- Replace the cover. Re-screw in the new fan and replace the grille to stabilize the new fan in its place.
- Touch-up. Caulk and spackle anywhere the ceiling/wall has been damaged. Paint over the spackle once it’s dry.
- Voila! You’re all set!

Reasons To Replace A Fan
There are a number of reasons to replace a fan, but the most common issues include:
- The fan is broken and simply needs to be replaced.
- The fan is noisy, likely due to the blades being out of balance.
- The fan is not ventilating properly, causing odors to remain trapped in the room.
- There is a wiring issue and the electrical components of the fan need to be replaced.
Considerations
“How do I replace a bathroom fan?” isn’t an easy question to answer, but we hope we’ve provided a little more clarity. It can be an expensive, arduous, and even a bit risky of a task, but for all the details you’re not comfortable handling alone, Taskrabbit is here to help!
Update Your Bathroom With Taskrabbit
Don’t want to take on the Task alone? Hire a Tasker to help, and put your mind at ease.
Last updated on April 23, 2025 by Boris Zahariev