How To Restore & Clean Leather
We all know it: leather is a classic material choice, whether it’s used on furniture, your new jacket or shoes, or vehicle interiors. Assuming you’re using regular leather vs. vegan leather, it’s always a best practice to protect it with a waterproofing and conditioning product like this one. Even so, stains and general damage can still happen, so we’ve gathered some tips below to give you a leg up as you learn how to clean and restore leather.
How To Clean Leather
General Leather Cleaning
If you’re wondering how to clean leather, you have a few options. While leather is extremely durable, it also requires that you take proper care of it. Old, unmaintained leather can easily fade, dry out, or develop cracks. This can happen from lack of proper care or exposure to dust, sunlight, oils, and rain/water damage.
Whether you’re cleaning a piece of furniture, a leather jacket, or leather shoes, you have a few options. We love HGTV’s DIY recommendation, which requires you to have:
- A bowl
- Water
- White vinegar
- A soft cloth (ideally microfiber or an old T-shirt)
To perform the clean, follow these steps:
- In a bowl, create a 50/50 mix of white vinegar and water.
- Dampen the soft cloth with the solution. Be sure not to soak it, though, as this could damage your leather.
- Apply the solution to your leather item by rubbing lightly in a circular motion to lift dirt out of the natural fibers. Don’t rub side to side—this can cause more wear and tear on the leather.
- Bring the cloth back to the bowl and wring it out. Do this often, but always make sure your rag is only damp—not soaked—when it touches the leather.
- If your solution gets dirty, refill it with a clean vinegar/water mix before continuing.
- Once you’ve covered all applicable surfaces, let your leather dry.
If you’re looking to buy a dedicated leather cleaning product, you can also check out cleaning and conditioning products like those made by Leather Honey.
How To Clean White Leather
With its pale cream color, white leather is definitely a target for stains and dirt. If you want to learn how to clean white leather, there are two easy options to try, both of which use ingredients you probably already have on hand.
50/50 Oil and Vinegar
To clean white leather, you can use a 50/50 mix of olive oil and white vinegar. Here’s the best approach:
- Mix 50/50 olive oil and white vinegar in a spray bottle.
- Spritz the mixture onto the stain.
- Let the mixture sit for five minutes.
- Wipe the stain away using a soft cloth.
- Always avoid bleach and ammonia-based cleaners, as they can damage the leather.
Toothpaste
Believe it or not, you can use toothpaste to clean white leather. Here’s how:
- Dampen the stained area with a wet cloth (but don’t soak it).
- Add a dollop of non-gel toothpaste to the cloth.
- Dab the toothpaste onto the stain.
- With a soft toothbrush, gently scrub the stain away.
- When finished, wipe the area with a clean, soft cloth.
While these two options are great for cleaning white leather, you again can also choose to use a dedicated leather-cleaning-and-conditioning product.
How To Remove Stains From Leather
Stains are part of life, but they can be extra crushing when they happen on expensive material like leather. You can definitely learn how to remove stains from leather, though—check out the list below for some of the most common types.
- Dark stains. If your light-colored leather has a dark stain, try mixing a 50/50 paste of lemon juice and cream of tartar. Rub the paste lightly on the stain, and let it sit for 10 minutes. Add another layer, and rub it in. Finally, remove the mix—and stain—with a damp sponge or cloth. You can also add moisturizing soap for extra effectiveness.
- Water stains. Oddly enough, you can remove water stains from leather with…water. Moisten the water stain with a dollop of water, and dry it either by letting it sit or by using a blow dryer set to low. Just be sure never to leave your leather out in the sun to dry, as this can cause further damage.
- Oil stains. Oil or grease doesn’t have to spell doom for leather. If this substance drops onto your leather item, try sprinkling cornstarch or baking soda on it. Let it sit overnight. By morning, the cornstarch or baking soda should have absorbed the oil. You can then rub the powder off with a soft cloth.
- Ink stains. If you’re wondering how to remove ink stains from leather, try dipping a cotton swab in rubbing alcohol. Blot it gently on the stain, and then blow dry it. If that’s not enough to remove the stain, you can apply a thick coat of non-gel, non-oily cuticle remover. Leave it overnight, then wipe it off with a damp cloth.
- Mold or mildew. Make a 50/50 mix of rubbing alcohol and water. Dampen a soft cloth with the solution, and wipe it on the stain. Finally, dampen a separate cloth with water, and wipe the mixture away.
- Road salt. If you live in a place that gets snow in the winter, you know about road salt! Unfortunately, it can stain your leather shoes, boots, or coat. To get rid of these stains, make a 50/50 mix of water and white vinegar. Blot the solution on all affected surfaces, and repeat as necessary until the stain is removed.

How To Restore & Repair Leather
Even if you’ve taken protective measures, the time may come when you need to know how to restore leather. Damage can happen to small cracks, large cracks, or color—it just depends on what your item has been exposed to.
How to repair small cracks in leather
As an animal skin, leather is made of tiny, interwoven fibers. While natural oils keep the skin healthy during the animal’s lifetime, it will need special care once it’s transformed into a leather product. At this point, the natural water in the proteins must be replaced by tanning agents, which can include lubricating oils and waxes.
If leather dries out, the fibers inside it can develop cracks—something that can be hidden but not undone. The good news? Leather conditioners can strengthen the intact fibers around small cracks, which can help blend them to look like natural imperfections.
To fix small cracks, you’ll need:
- A high-quality conditioner
- A soft, dry brush or cloth
- A fine-bristled brush
- Mild soap
- A spoon
Once you have all these items, follow these steps:
- Clean the leather. It’s always best to test the cleaning solution on a small area first to make sure it doesn’t harm the leather. Next, clean the crack and surrounding surface with a soft, dry brush or cloth. Then clean it a second time—more deeply—with a fine-bristled brush and mild soap. The goal is to get your leather soft and flexible!
- Apply your conditioner. After testing the conditioner on a small patch, apply it over the crack using a finger or sponge, or the back of a spoon. Continue smoothing it until the crack is less pronounced. Wipe off any excess conditioner, and let the leather dry overnight so it can absorb the product further and rehydrate.
- Repeat the process if necessary. While you’ll want to avoid over-conditioning your leather (oils in particular can collapse the material’s structure, leaving a waxy, slippery appearance), you may need to repeat the above process once per month. This will keep your item in good condition and help prevent further drying and cracking.
How To Repair Deep Cracks In Leather
To repair deep cracks in leather, you can use crack filler, leather dye, or both. Below, we’ll cover both processes!
Repairing With Leather Crack Filler
Before you repair leather with crack filler, you’ll need the following items:
- Soap or leather cleaner
- A cloth or sponge
- 600-grit super-fine sandpaper
- A good quality leather filler
- A palette knife
Next, you’ll follow these steps:
- Clean and dry the leather. Follow the same steps as above, and wipe off any excess moisture so the clean leather dries faster.
- Let it sit overnight. You want the leather to be fully dry before continuing!
- Smooth the cracks using super-fine, 600-grit sandpaper. Apply gentle pressure on the crack. Stop sanding when the cracks are smooth to the touch, and then wipe away any dust with a dry cloth.
- Apply the crack filler to the leather. First, spread the filler over the cracks with a palette knife. Next, brush in the paste to fill the cracks. Apply more if needed, until the cracks are filled.
- Remove any extra filler with the palette knife. Gently scrape off the excess paste by rubbing the knife sideways over the cracks. Repeat until you don’t see any paste spilling over the edges.
- Let the leather dry. It usually takes at least six hours for the filler to set and solidify. The leather will dry faster in a room with good ventilation or in open air. Just be sure to keep the leather away from direct heat or sunlight!
- Repeat the process if necessary. It’s normal for fillers to shrink when drying, so you may have to repeat the process.
Hiding Cracks with leather dye
While leather dye can be a great way to repair superficial damage on your leather product, you can also combine it with crack filler to fix deep cracks. Before you use leather dye, you’ll need:
- Soap or leather cleaner
- A cloth or sponge
- 600-grit super-fine sandpaper
- A good quality leather filler
- A palette knife
- Leather dye that matches your leather color
- A color-fast sponge or applicator pad
- A hair dryer
- Leather sealer
Next, follow these steps:
- Prep the crack with leather filler. See the above steps for tips on how to do this!
- Sand the crack with 600-grit sandpaper. Prep the surface for dye by making it smooth to the touch. Wipe away any dust so it doesn’t clog the dye.
- Apply the dye to the crack. Using a color-fast sponge or applicator pad, cover the crack with a thin layer of dye. Rub it in to assure the dye is evenly distributed.
- Dry the crack with a hair dryer. With the hair dryer set to low, dry the crack for two minutes. Be sure to move the hair dryer back and forth to distribute the air across the entire area.
- Blend the cracks. Depending on how deep the crack is, you may need to reapply the dye up to five times. Repeat Step 4 as needed, making sure the dye is dry before each new coat.
- Spray on leather sealer. After carefully reading the directions for the leather sealer, spray it on to protect and condition the dye. Rub it into the affected area, and apply a second coat if needed. Cure the sealer by using a hair dryer (set to low) for two minutes.
How To Restore Color To Leather
Leather can become faded for a number of reasons, including heavy use and exposure to sunlight, bleaching chemicals, or even dog slobber. Sometimes, actual stains or buildup stuck to leather can be removed successfully. If you’re dealing with actual damage, however, there’s no way to undo it completely.
But don’t panic! You still have some options for color restoration. You can hire a professional to conceal the damage with special dyes or paints, or you can try applying a low-cost, easy-to-buy leather balm. Just be sure to read all instructions or caveats before buying a product, as the condition of your leather—and how absorbent it still is—can affect how well these products work.
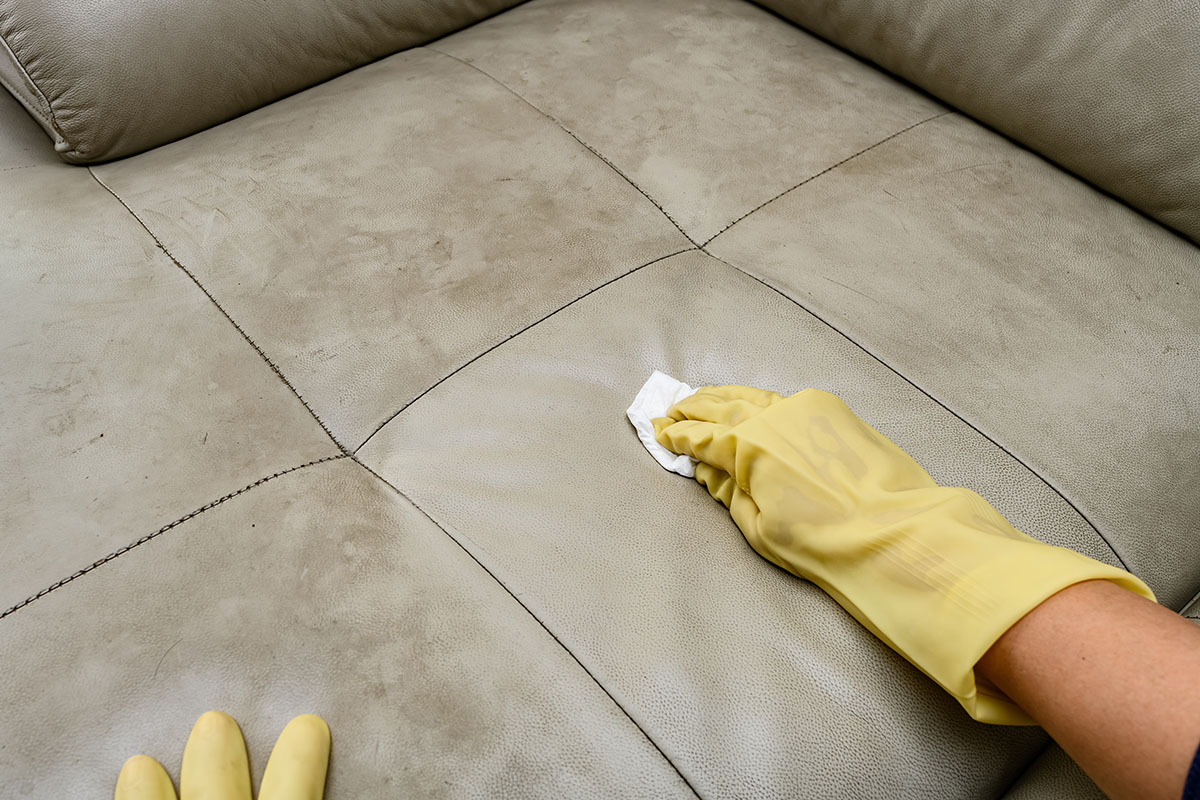
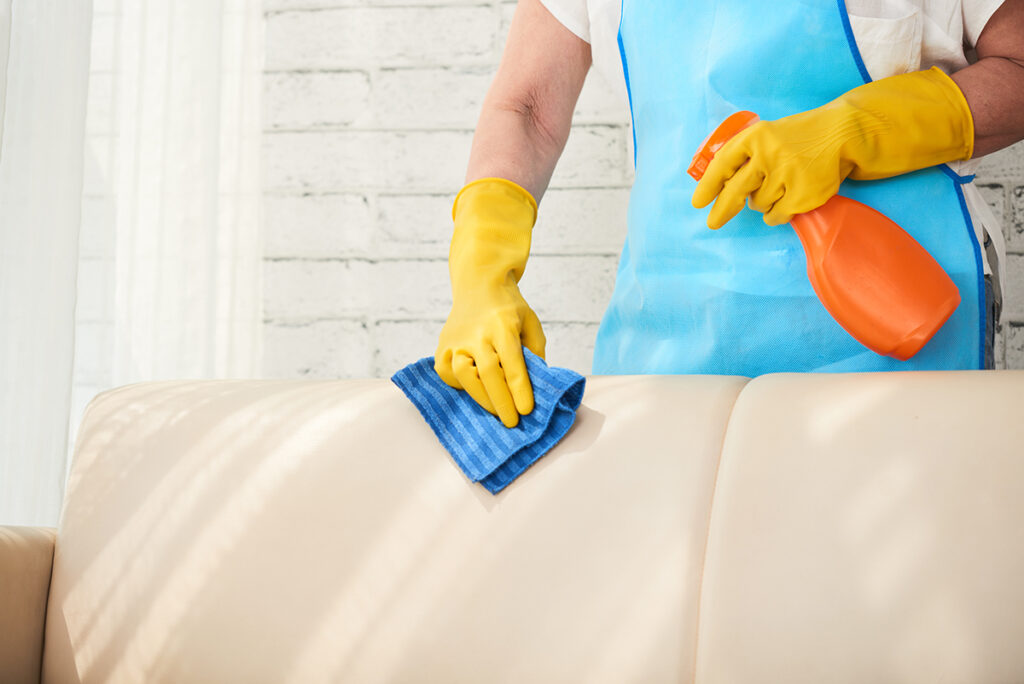
How To Clean & Restore A Leather Couch
Finally, you may be wondering how to clean a leather couch (or restore it if it’s damaged). These are often the centerpieces of our living rooms, and given that they’re pricey, you’ll definitely want to keep them in good condition.
How To Clean A Leather Couch
To clean a leather couch—whether it’s just a simple stain or the entire piece—you’ll need:
- A 50/50 mix of mild dish soap and warm water
- Microfiber cloths
- Leather conditioner/cleaner
- Baking soda
- A vacuum
Once you have these items:

- Vacuum the couch to get rid of crumbs. If your couch cushions can be removed, don’t forget to vacuum underneath them!
- Dip the microfiber cloth in the 50/50 water and soap mix. Ring the cloth out so it’s damp but not wet.
- Lightly rub the mixture onto any stains in small circles. Again, be careful not to rub back and forth, as this can cause further wear and tear to the leather.
- For grease stains, use a dry cloth and baking soda. Let the baking soda absorb the stain before wiping it away.
- Dry the couch thoroughly. Using a dry, clean cloth, wipe down any moisture left on the couch. You may need to let it dry overnight before continuing to the next step.
- Apply the leather conditioner/cleaner. Many of these solutions are 2-in-1 cleaners and conditioners, and they help break down dirt and stains to make your leather couch look like new. Spray the cleaner onto your cloth, and apply it in circles across the entire surface of the couch. If your cleaner is separate from your conditioner, make sure to wipe down any excess residue before applying the conditioner.
- Let the couch dry for at least an hour. After that, your leather couch should look cleaner, newer, and ready to use.
How To Restore A Leather Couch
Many of the strategies we’ve covered above can help you if you need to know how to restore a leather couch. But what if there’s an even bigger issue, such as a rip in your leather? Given how expensive a new couch might be, you might want to consider these DIY fixes:
- Super glue or leather adhesive. If the tear in your leather couch isn’t too big, you can apply adhesive along one edge of the tear. Press the two edges together, and hold them steady until the glue sets. (It may go without saying, but make sure your fingers or tools aren’t also touching the glue!)
- A leather subpatch. If adhesives won’t fix your tear, you can try a leather subpatch. First, carefully cut the edges of the tear with a sharp blade. Next, set a subpatch underneath the edges of the tear, and bring the edges as closely together as possible so there’s little to no gap. Finally, superglue both edges to the subpatch. The closer together the tear’s edges are, the better.
Leather is a luxurious yet tricky material. The better you care for it, the longer it will last. If your leather couch has more severe damage than what’s listed above, you may want to seek out a professional repair service. If you’re simply needing to save time, however, you can always hire a Tasker to do the busy work
Last updated on October 30, 2024 by Meghan Lalonde